s3blkdev is a gateway between an S3 compatible storage and Linux network block devices. On its frontend side it acts as an NBD server, which serves block devices (read: virtual hard disks) to the Linux kernel. On its backend side it synchronizes these virtual hard disks to an S3 compatible storage. Virtual hard disks are split into small and compressed pieces called chunks. Most recently used chunks are kept locally. When this local cache becomes too big, least recently used chunks will be evicted to the S3 storage. If the kernel asks for a chunk which is not in the local cache, s3blkdev will transparently download it. Additionally, the cache is synchronized to the S3 storage on a daily or weekly basis.
One s3blkdev instance can present multiple block devices to the kernel, but needs just one S3 bucket. The chunks of each block device are saved to different subfolders (yes, S3 doesn't know anything about subfolders, but for the moment let's refer to the name part between two forward slashes in an S3 url as subfolder). If your S3 storage is reachable on different ip addresses and/or ports, then you can configure s3blkdev to use them in a round robin fashion. Both http and https are supported.
Development platform is a Gentoo Linux box running a Linux kernel version >= 4, and latest packages from portage.
Both s3blkdevd and s3blkdev-sync expect the configuration file /usr/local/etc/s3blkdev.conf unless overwritten by command line option -c. An example configuration file named s3blkdev.conf.dist has been copied into the same directory during installation:
listen /tmp/s3blkdevd.sock
port 10809
workers 8
fetchers 2

s3host
s3port
s3ssl 1
s3accesskey
s3secretkey
s3bucket
s3timeout 10000
# s3name
# s3maxreqsperconn 100

# [device1]
# cachedir /ssd/device1
# size 200000000000
| Option | Description |
|---|---|
| listen | IPv4/IPv6 address or local Unix socket to listen on |
| port | port to listen on, ignored if listen is a Unix socket |
| workers | number of server threads, max. count of simultaneous I/O requests |
| fetchers | max. number of simultaneous downloads from S3 storage |
| s3host | IPv4/IPv6 address or hostname without leading bucket name of S3 storage up to 4 host statements may be specified |
| port | TCP port number of S3 storage up to 4 port statements may be specified, resulting in s3host x s3port connections |
| s3ssl | use HTTPS instead of HTTP to connect to S3 storage |
| s3accesskey | user name for S3 storage |
| s3secretkey | password for S3 storage |
| s3bucket | name of bucket |
| s3timeout | timeout of S3 operations in milliseconds |
| s3name | put this name in the Host: header when talking to S3 backends; by default, the Host: header will contain the value of the current s3host |
| s3maxreqsperconn | close a backend connection after this many requests; defaults to 100 requests |
| Option | Description |
|---|---|
| cachedir | local directory where s3blkdev caches chunks for the current device; place this on an SSD, preferably |
| size | size of block device in bytes |
s3blkdevd should be started as an unprivileged user. As it increases its stack size to 32 MB, you might want to check with ulimits. If you send SIGTERM to s3blkdevd, it will exit nicely, but will most likely leave any mounted filesystem on top its exported devices in an undesirable state. It accepts the following options. Note that the pid file has to be specified:
s3blkdevd V0.6

Usage:

s3blkdevd [-c <config file>] [-p <pid file>]
s3blkdevd -h

  -c <config file>    read config options from specified file instead of
                      /usr/local/etc/s3blkdev.conf
  -p <pid file>       daemonize and save pid to this file
  -h                  show this help ;-)
Let's assume you configured a device named foobar in s3blkdev.conf, and s3blkdevd is running. To create an ext4 filesystem on that device, run the following commands:
s3blkdev-sync has two operational modes: Eviction ensures that the local cache directories have enough free space. Synchronization simply copies any changed chunks to S3 storage. Thus, you should create two cron jobs:
* * * * * /usr/local/sbin/s3blkdev-sync -p /var/run/s3blkdev-evict.pid 90 80
0 23 * * * /usr/local/sbin/s3blkdev-sync -p /var/run/s3blkdev-sync.pid 36000
The first cron job runs every minute. If any local cache directory has more than 90% disk space in use, chunks will be evicted until disk usage drops below 80%. Eviction itself consists of two rounds: First, any chunk that has been uploaded to S3 storage, but has not been changed locally, is deleted. Secondly, remaining chunks (starting with least recently used ones) are uploaded and deleted until disk space drops below 80%.
* * * * * /usr/local/sbin/s3blkdev-sync -p /var/run/s3blkdev-evict0.pid 90 80 0 50
* * * * * /usr/local/sbin/s3blkdev-sync -p /var/run/s3blkdev-evict1.pid 90 80 50 100
0 23 * * * /usr/local/sbin/s3blkdev-sync -p /var/run/s3blkdev-sync0.pid 36000 0 33
0 23 * * * /usr/local/sbin/s3blkdev-sync -p /var/run/s3blkdev-sync1.pid 36000 33 66
0 23 * * * /usr/local/sbin/s3blkdev-sync -p /var/run/s3blkdev-sync2.pid 36000 66 100
Two instances will start in eviction mode every minute. Each instance will handle 50% of all chunks. Every evening at 11 p.m. three instances will start in sync mode. Each one will run for 10 hours and will handle one 33% of all chunks (to be more precise, the last one will handle 34%). Don't forget to specify different pid files when using multiple instances.
[device0]
cachedir /cache0
size 2000000000
nbd0 /tmp/s3blkdevd.sock device0 unix,persist,bs=4096
nbd
lvcreate -L 4G -n lvcache0 ubuntu-vg
lvcreate -L 128M -n lvjrnl0 ubuntu-vg
/dev/ubuntu-vg/lvcache0	/cache0	ext4	discard,nodiratime	1 2
/dev/nbd0	/device0	ext4	_netdev,journal_async_commit,stripe=2048,noatime,nodiratime,x-systemd.requires=nbd@nbd0.service	1 2
mkfs.ext4 /dev/ubuntu-vg/lvcache0
mkdir /cache0
mount /cache0
systemctl start s3blkdevd.service
nbd-client -N device0 -b 4096 -p -u /tmp/s3blkdevd.sock /dev/nbd0
mkfs.ext4 -b 4096 -O journal_dev /dev/ubuntu-vg/lvjrnl0
mkfs.ext4 -J device=UUID=11111111-2222-3333-4444-555555555555 -E stride=2048,stripe_width=2048 /dev/nbd0
nbd-client -d /dev/nbd0
[Unit]
Requires=s3blkdevd.service
After=s3blkdevd.service
[Unit]
ConditionPathIsMountPoint=/device0
systemctl daemon-reload
systemctl start device0.mountor start any service depending on /device0, e.g. netatalk:
systemctl start netatalk.service
[device0]
cachedir /cache0
size 2000000000
NBD_DEVICE[0]=/dev/nbd0
NBD_TYPE[0]=f
NBD_HOST[0]=/tmp/s3blkdevd.sock
NBD_PORT[0]=
NBD_NAME[0]=device0
NBD_EXTRA[0]="-b 4096 -n -p -u"
lvcreate -L 4G -n lvcache0 ubuntu-vg
lvcreate -L 128M -n lvjrnl0 ubuntu-vg
/dev/ubuntu-vg/lvcache0	/cache0	ext4	discard,nodiratime	1 2
/dev/nbd0	/device0	ext4	noauto,journal_async_commit,stripe=2048,noatime	1 2
mkfs.ext4 /dev/ubuntu-vg/lvcache0
mkdir /cache0
mount /cache0
systemctl start s3blkdevd.service
nbd-client -N device0 -b 4096 -p -u /tmp/s3blkdevd.sock /dev/nbd0
mkfs.ext4 -b 4096 -O journal_dev /dev/ubuntu-vg/lvjrnl0
mkfs.ext4 -J device=UUID=11111111-2222-3333-4444-555555555555 -E stride=2048,stripe_width=2048 /dev/nbd0
nbd-client -d /dev/nbd0
systemctl start nbd@0.service
[Unit]
Requires=nbd@0.service
After=nbd@0.service
ConditionPathIsMountPoint=/device0
systemctl daemon-reload
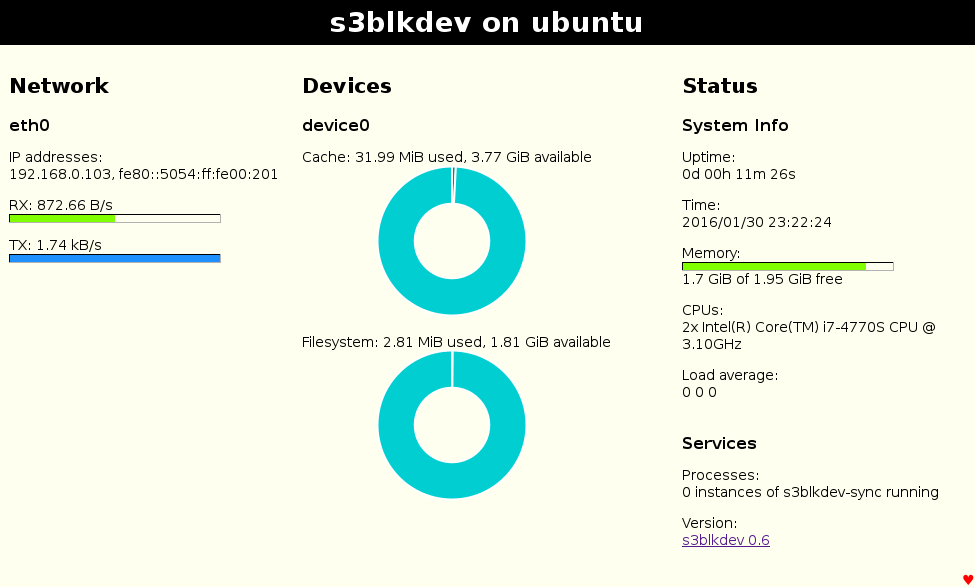
Starting with version 0.6, s3blkdev comes with an HTML frontend based on Node.js. It shows current disk usage and network throughput. Here's a screenshot.
Bleeding edge: https://github.com/felixjogris/s3blkdev